
How to Make a Storyboard for a Picture Book (And Why It Matters)
Creating a picture book is a little like directing a film - you’re not just illustrating individual scenes, you’re shaping how a story flows across the pages. That’s where a storyboard comes in.
Whether you’re a writer, illustrator, or both, storyboarding helps you map out the entire book before you get caught up in the details. In this post, I’ll walk you through my storyboard process, explain why it’s such a powerful tool, and share an example from my own book, ‘Are You Bored?’
What Is a Storyboard?
A storyboard is a visual plan of your book - a series of small, rough drawings that show what happens on each page or spread. Think of it as a bird’s-eye view of your whole book at once. It helps you:
Organize the pacing and rhythm of the story
Balance text and image
Spot confusing page turns or uneven scenes
Avoid surprises late in the process
It’s one of the most important steps I take before refining any illustration.
Step 1: Interpreting the Text
Before I draw anything, I read through the manuscript several times. I’m looking for:
Natural breaks in the text
Emotional beats or action moments
Opportunities for visual storytelling
I divide the text into spreads, keeping in mind how much text will fit comfortably on each page and how it might interact with the illustration. Sometimes a moment is better shown than told - that’s where illustration can quietly do the storytelling.
I create a separate document with the manuscript and make notes about the illustration ideas for each page or spread. This helps me to clarify the idea for each page and to compare them with the author’s idea for each section. Sometimes, authors have a clear idea for visualization of a specific action or a scene in a book and we can decide what illustration would fit better.
It’s a bit different when I illustrate my own book. But even then I consult my ideas with editors and friends. It’s always good to have a second opinion.
Step 2: Sketching the Storyboard
Next, I sketch the whole book in miniature — quick and loose. I’m not worried about detail or perfection here. The goal is to get a sense of:
Composition
Flow from page to page
Variety in scene size, angle, and emotion
Where the reader’s eye will travel
Sometimes I make thumbnails first, but more often I dive straight into these rough sketches to see how it feels. Then I step back and check — does the story make sense visually? Are the page turns exciting? Does the pacing feel right?
Example:
‘Are You Bored?’ Storyboard
For my picture book Are You Bored?, I used this exact process.
First, I broke the manuscript into 19 spreads. I noted where dialogue or action shifted and made sure each scene had space to breathe. I kept in mind the character of the story and what illustrations opportunities it provided. I knew I wanted to have a serate illustration for each anti-boredom activity I’m proposing.
Then I sketched each spread loosely, experimenting with how to show moments like a child slumping in boredom, or suddenly getting swept into imagination. I used my storyboard to:
Try out different compositions
Keep visual interest balanced across the book
Plan where illustrations would carry the storytelling on their own
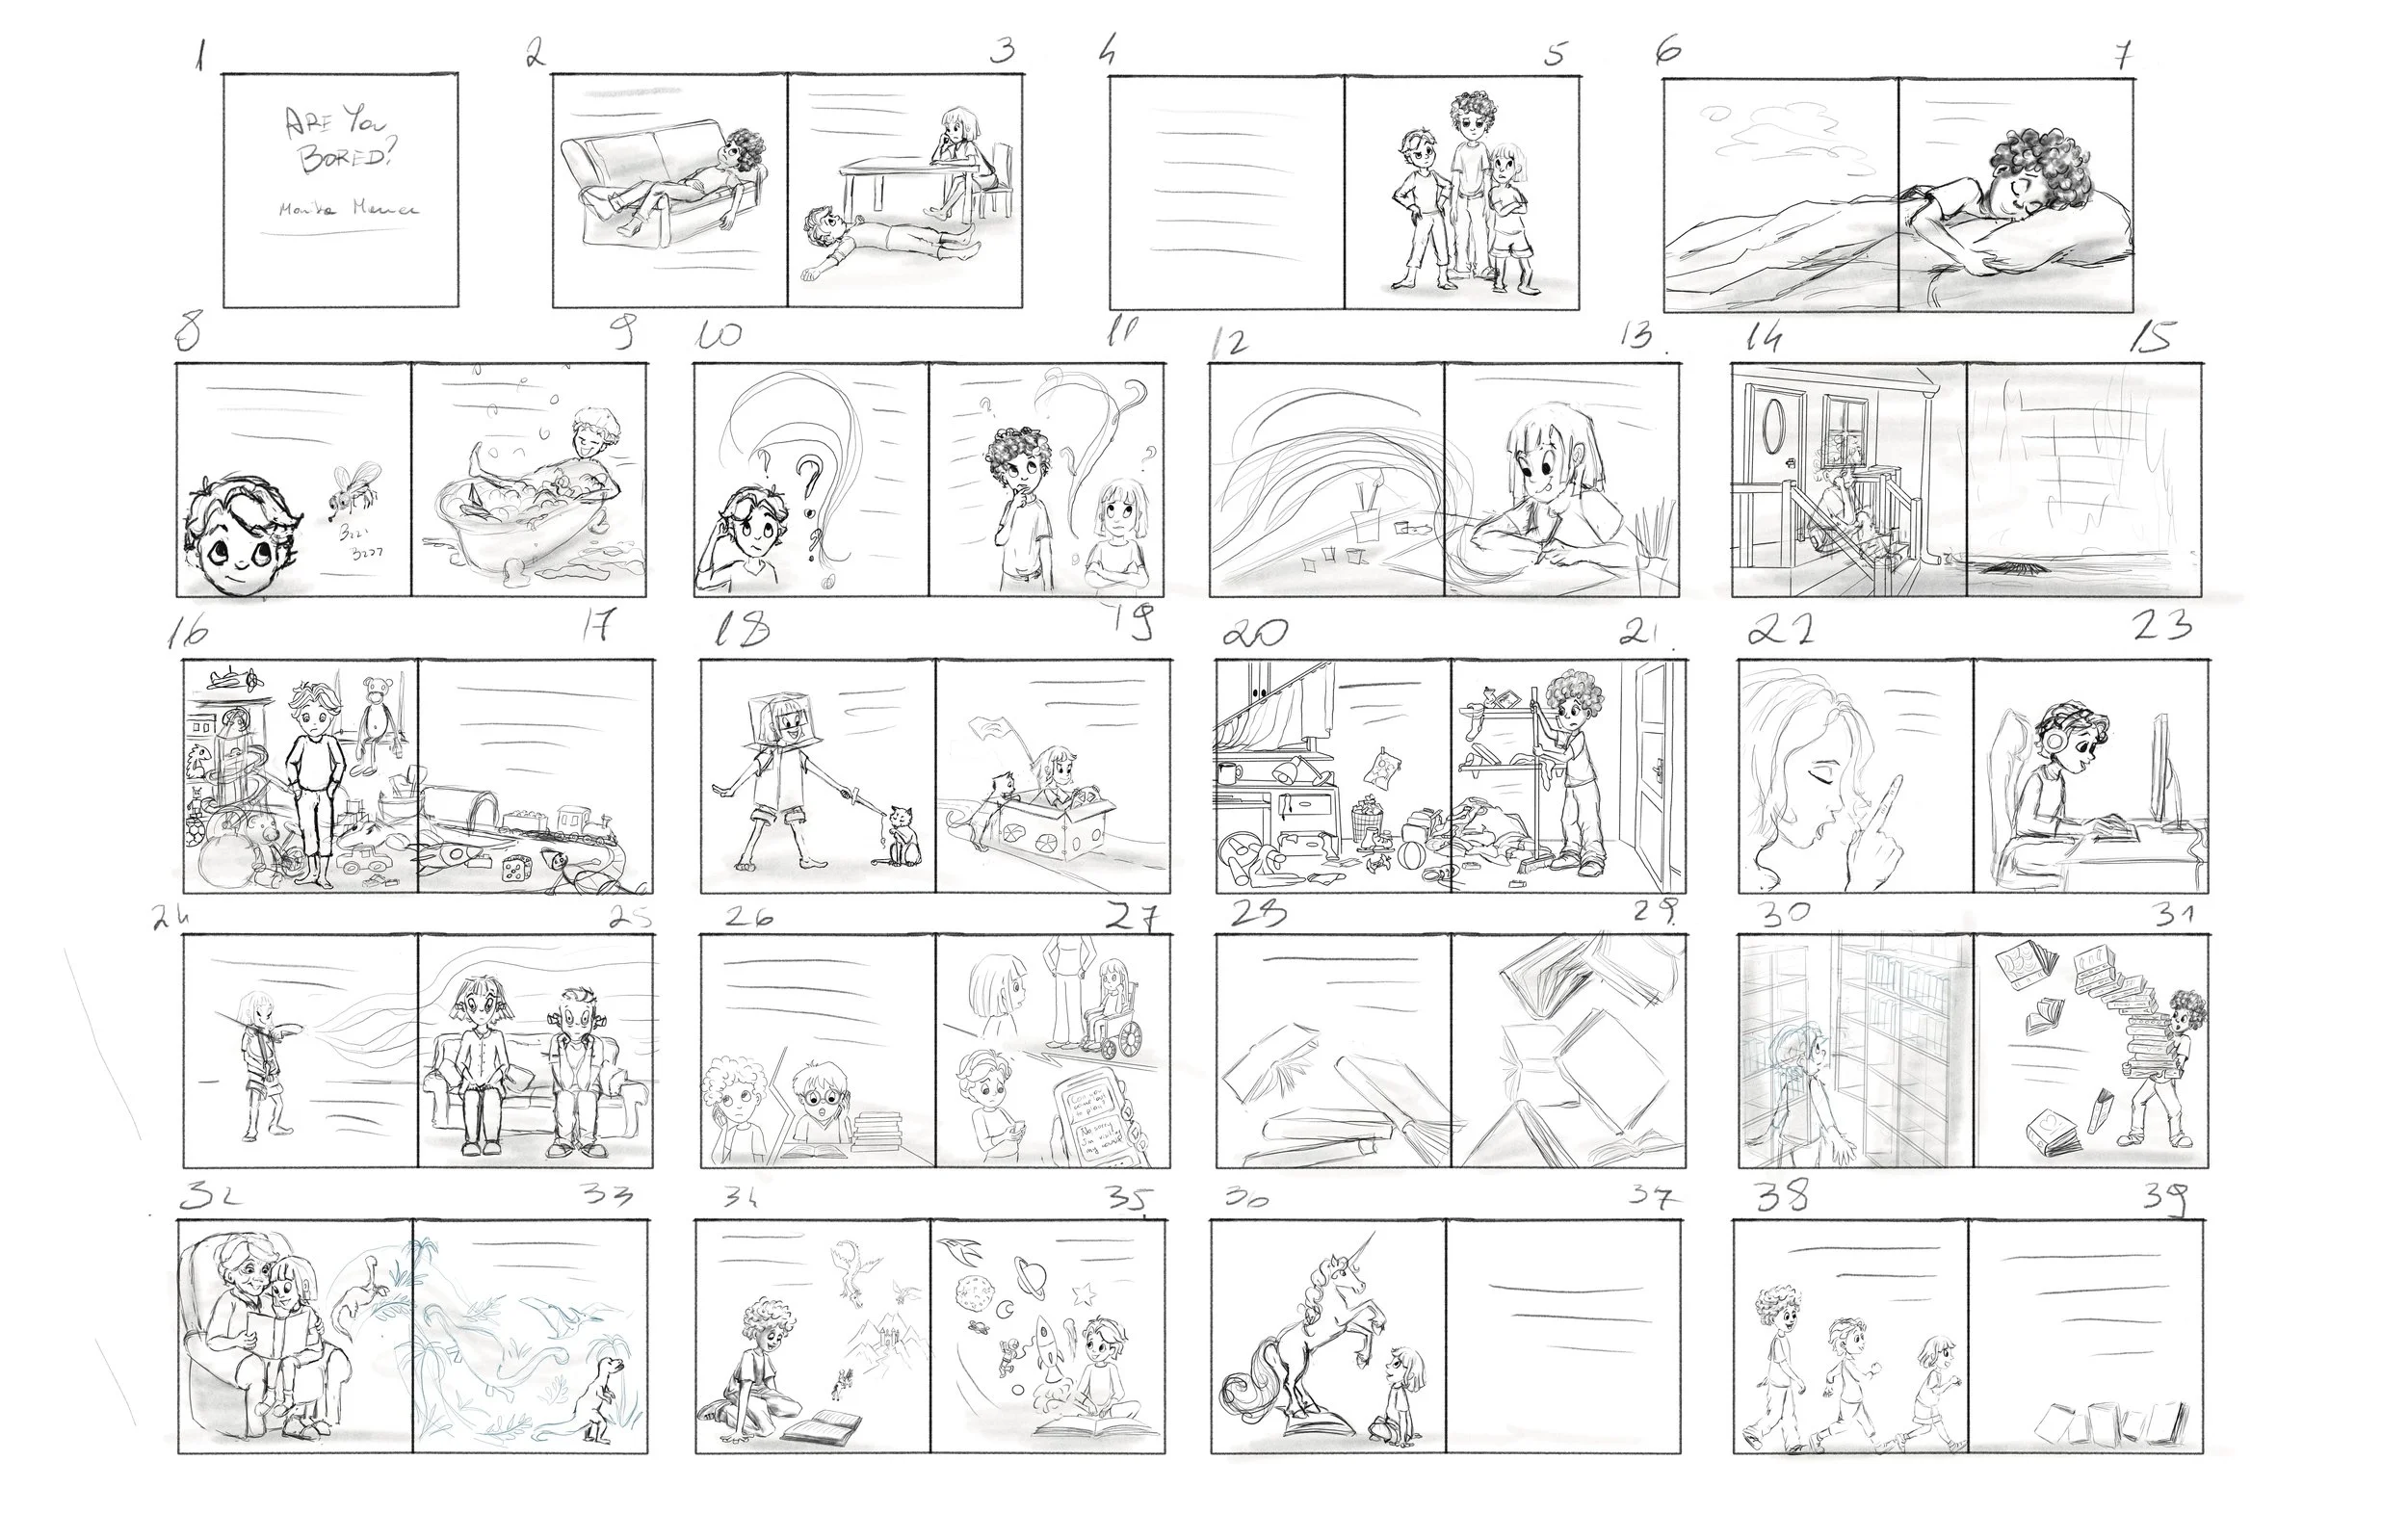
‘Are You Bored?’ Storyboard I’ve created based on my rough sketches for each spread.
Why It’s Worth the Effort
Storyboarding saves you time later. It’s much easier to make changes at the sketch stage than after you’ve painted a detailed illustration. It also helps:
Avoid repetitive layouts
Create emotional contrast between spreads
Support the narrative arc from beginning to end
Even if you’re not the illustrator, a rough storyboard can help you see whether your text flows well across the book format.
Final Tip
Don’t worry if your storyboard is messy. It’s not about perfection - it’s about planning and experimenting. Think of it as your playground before the real work begins.
I hope this gives you a helpful look into my process! If you’re working on a picture book and want to try storyboarding, feel free to ask questions or share your own tips below.
How You Can Support My Work
If you found this guide helpful and would like to support what I do, there are a few meaningful ways to help. You can explore my books Are You Bored? and Are You Bored? Activity Book, share this article with fellow illustrators or authors, or leave a review if you’ve read the book—it truly makes a difference. You can also support my ongoing illustration, writing, and free educational content by visiting my Buy Me a Coffee page, which helps me continue creating resources like this blog and sharing my process openly with the children’s book community.